The Pearly Story Behind "Dusting in Pearls"


I always feel like a walking paradox. I can get out in the garden with my shovel and sledgehammer and love every dusty dirty minute I'm out there. I spend the majority of my life dressed in my "grubbies". Yet there's a part of me deep down inside that still likes "the frillies", "the pearlies", and "the sparklies"--all the pretty things. Maybe it's all the great classic Hollywood movies I watched as a kid. I don't know. All I know is that I can be dirty and sweaty and still want to put on heels when it isn't practical; buy the prettiest apron even if it will get dirty; and don pearls when all I'm going to be doing is dusting and vacuuming the house. It doesn't make sense. It doesn't have to. I've decided to claim it, celebrate it, and have fun with it... and create some "pearly" goodness along the way.

Wednesday, October 7, 2009

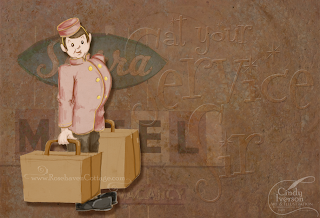
Bellhop

Click on image to view larger


I felt like "playing" today with one of my sketches that I've had in my sketchbook for quite some time. I brought the bellhop pencil sketch into Photoshop for the digital coloring using the same technique I did for "Downward Dog". Once the bellhop was done, I put him into a composition using one of my own photographs, a couple of my textures, and a fun new font I found at dafont.com.

Font: Fontdinerdotcom Sparkly
Textures: Autumn Haze and an old paper texture I scanned in (if you want it ask me)
Photo: Vintage Sierra Motel Sign

Monday, October 5, 2009

Behind the Scenes: The Beaded Chick

The past couple of weeks, I've had the immense pleasure of doing a design job for Kimberly over at The Beaded Chick. She contacted me after seeing my work at the Rosehaven Cottage Digital Download Shop. She needed a custom-designed logo for her sterling silver and Swarovski crystal jewelry business and wondered if I could create one for her.

Since Kimberly and I live on separate coasts of the U.S., all our communications were via email (and Flickr). Kimberly gave me a wonderful description of what her vision for the logo was. My job was to interpret it into a little chick that she would love. So the first thing I needed to do was some pencil sketching. This is the pencil sketch that I started out with...

I scanned the pencil sketch into the computer and opened it in Adobe Illustrator CS3 to do the "inking" (back in school I really used pen and ink for this step). I use Illustrator because it will create a vector graphic that will resize to any size without losing quality (no pixelated and jagged edges). I like to used a brush set on "charcoal" at various stroke widths to get the art marker look I like.

After the initial pencil sketch, Kimberly communicated an additional piece of her vision--that the little chick would be wearing a ring and a bracelet. So with those additions, the finished "inking" ended up looking like this...

Then it was time to add some color. At this point, I switched over to Adobe Photoshop CS3 and placed the image into a Photoshop document (Illustrator files are compatible with Photoshop). Then I started creating layer after layer of color by "drawing" the color on using my digital tablet and a stylus. Every time I changed colors, I made a new layer (in case I wanted to make any adjustments along the way). The "inking" layer always stayed as the top layer over the colors. Doing this part is always a lot of fun and feels like coloring in a coloring book to me.

When I was done, I had this...


Once I had the little chick completed, I was also able to design Kimberly's blog header for her. Kimberly hadn't settled on any font type yet, so I hunted around over at dafont.com to find a free font that would convey a jeweled or beaded quality. I found Razzle Dazzle and knew it was the perfect fit! I already had MA Sexy for the pretty hot pink cursive writing. Using Kimberly's blog template as a color guide, I built the header to match her beautiful color palette. And this is what the finished header looks like...


Hubby loves the little "Beaded Chick". And I have to humbly admit that I do too and it's all because of Kimberly vision. Thank you, Kimberly, for this wonderful opportunity to create her for you! I am excited to see her write about her own creative journey on "The Beaded Chick" blog.

All bold words in this post are click-able links

Saturday, September 26, 2009

Uncharted waters ahead


Because the summer heat around here is so oppressive, I spend the summer months indoors staying cool with the air conditioner. It isn't until sometime in October that I venture back out into the garden for the next 8-9 months until the heat drives me back inside again. So during the summer months, I do an awful lot of soul-searching and pondering. I do a lot of pondering while I garden the rest of the year, but it is often a different kind of pondering that is more spiritual in nature. My summer pondering is that of a woman in "hibernation" and often has a "cocoon effect" on me so that by the end of summer I'm ready to burst forth like a butterfly ready to take wing.

This summer, I've done a great deal of soul-searching and self-evaluation during my months of hibernation. And in counsel with my best friend (who is also my sweet spouse), I felt brave enough to take a step into uncharted waters in my creative journey. So I applied to the Academy of Art University in San Francisco to the Master of Fine Arts program in Illustration. A large part of me expected to not get in, but I knew I needed to at least go through the process of taking the risk.
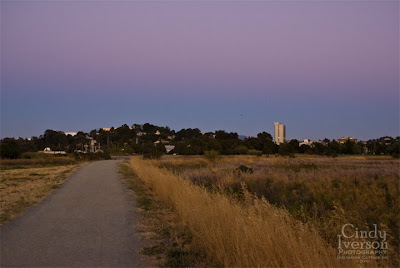


My creative journey has been a circuitous one. I've been creating with a pencil in my hand since I was old enough to hold one (my mom has the home movies to prove it). Through some wonderful serendipitous circumstances, I was able to attend a public school in first grade that had an art program with a dedicated art teacher who taught her students (me included) how to draw still life at age 7! Now that I reflect back on it, I realize was an amazing and rare experience that was. As I got older, I plugged along through various public schools (we moved frequently during my childhood). By junior high and high school I was choosing to take art as an elective no matter what. I learned sculpture, pottery, drawing, painting, and just about every other medium you can imagine.

After high school, I dabbled in a few college majors before settling on Commercial Art and earned my Associates of Arts degree at a community college. I walked out of that program with the training to be a graphic artist and the portfolio to prove it. I went to interview after interview for creative positions. But no jobs materialized. My dream had been to work for Disney, so I even trekked down to L.A. for a couple of months trying to get a job there. It didn't happen. It seemed I was not destined to be a professional graphic artist. I ended up working in secretarial and data entry capacities in order to earn money (good thing my mom had strongly encouraged me to take typing and 10-key in high school).

After a few unfulfilling years working in administrative jobs, I decided to go back to school and earn my Bachelor's degree. I was drawn to Mills College and ended up in their Art History program. My two years there were an awakening for me as a 26-28 year old woman. I gained a lot of confidence and self-assurance there. I did a lot of writing for Art History and enjoyed it immensely. My professors said I showed promise and hoped that I would go on to get my graduate degrees in Art History as well. But I didn't. I had to go back into the workforce and earn money again.



"Corporate America" was a bit kinder to me after I had my Bachelor's degree. I was able to get work in project administration capacities. I tried to carve out "creative" niches in my work as a technical writer and computer trainer. I was always the one that got to do the office newsletters and flyers.

But my "real" art still remained in a portfolio and in a secret place in my heart. My creativity found outlets in the privacy of my own home. I never earned a living creating art. And it always seemed like a very sad disappointment that I felt I needed to hide. Sometimes I'd get brave and send a set of slides to a greeting card publisher. I even invested in having some cards printed up professionally but couldn't sell them to retailers. I let my inner artist slowly go to sleep in a place deep inside me.

I got married when I was 31 years old. Within months of getting married, my physical health deteriorated rapidly. I had been burdened with chronic pain since I was 15 years old, but no doctor was able to diagnose anything other than PMS. By the time I was 31, I became completely incapacitated. So my husband became the soul breadwinner in our home. I stayed home and thought it was a good opportunity to try to get creative again. I tried my hand at cross-stitching. Once (at the prompting of my brother when he gave me a beautiful wooden easel as a gift) I brought out my paints and a canvas and painted one painting. I gave away most of my art supplies to my brother who was in art classes at the time. I figured I was passing the torch on for good. All my creative pursuits were limited and very "safe" like embroidery and sewing. I couldn't venture to the place where I had taken risks a decade before. That was too scary.

A couple of years after I got married, we bought our house and I delved into the adventures of remodeling and renovation. My creativity found an outlet in home construction as I tiled, sheet-rocked, taped, textured, laid hardwood floors, and installed trim. It also found an outlet in the garden as I took our dried up lot and made it bloom into a drought-tolerant cottage-style garden.

After a few years of working on the house despite my chronic pain, I finally found a doctor that listened. A month after my 39th birthday, I underwent the surgery that revealed I had been plagued with a crippling case of endometriosis for over 20 years. I was given my life back. For me, life really did begin at 40. I spent the next 1-2 years healing my physical body. But my inner artist was still fast asleep.

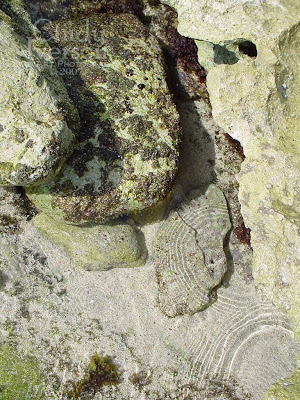


It wasn't until the spring of 2007 on a vacation, when I started shooting photos on the beach that I realized there was a creative artist in me that, like Sleeping Beauty, was ready to wake up. However, because I have to allow myself to be slightly vulnerable when I create, I had to take things slowly and ease into it again. The more involved the creative method is (like painting), the more vulnerable I have to be to create. I had to take baby steps. I couldn't just jump back in with both feet. It was too scary.

First, I ventured into photography again because that was the safest place to start. I could shoot what I saw. With a digital camera, I didn't even have to worry about wasting film. If a shot didn't turn out, I hadn't taken a huge creative risk. I could just delete the image. I started dabbling in some post-processing techniques using Photoshop to get a little more creative with the photographs. But things still remained pretty safe. And it helped that I shot a lot of my images in my gardens and places that I loved.

Then after about a year of that, I started playing with some digitally produced art. I doodled using my computer and a newly acquired digital tablet. Creating that way was pretty safe too, because I could always hit "undo" or erase something. Nothing was really permanent.

I did that for a while, until I felt safe enough to get my sketchbooks back out and started sketching in them. One sketchbook hadn't been touched in over 10 years. This step was pretty hard. I found myself wanting to make every sketch be perfect. Sometimes, I would find myself paralyzed and unable to sketch anything because of the fear of sketching something wrong and not creating a "masterpiece" every time. It was very hard to make myself take risks in that sketchbook (it still is).

I also invested in a new set of watercolors (my original tubes from 20 years ago had dried up). I brought out my unused watercolor paper from 15 years before and started painting in watercolors again. I successfully took that step into a more vulnerable place.


Then my father-in-law passed away in April 2009. In his spare time, Dad was a very talented painter in acrylics and oils. After the funeral, my mother-in-law gave me all Dad's blank canvases, his vast collection of exquisite brushes, and his entire set of paints. I drove home with a mini art supply store in the back of our vehicle. I let the canvases sit for a couple of days, but they kept "calling out to me". In the midst of my grief, I knew Dad wanted me to paint something with everything I'd been given. I brushed the dust off that wooden easel my brother had given me 10 years before (it still looked brand new), and I made myself put a paint-laden brush to canvas. That was really hard. I couldn't hit the "undo" command when I was painting. It was just me, the brush, the acrylic paint and the canvas... and Dad, who I could feel quietly prodding me on. But once I got into the groove, boy, did it feel good.
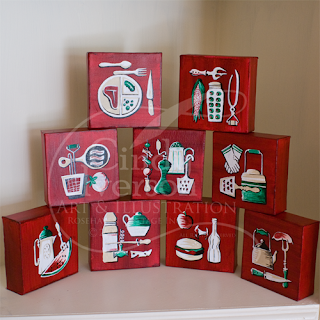

Every step of the way, I felt myself getting closer to my artistic core--the place where I had to be willing to be vulnerable in order to create.

At the same time as I was taking up painting again, I also started taking floral design classes at our local adult education center. I am an introvert with some social anxiety, so going back into a classroom setting again with strangers was a huge step for me in my creative journey. I had to learn all over again how to allow my creative work to be critiqued; how to create in the midst of others observing my creative process; and how to make mistakes in front of an instructor and classmates. It was hard at first. But I persevered and can honestly say that I welcome those aspects of the creative process now. I actually thrive off of it.

It seemed inevitable that my next step would be to revisit the idea of pursuing my graduate degree after I had put that goal on hold for 15 years. I chose the Academy of Art University in San Francisco mainly because of it's online degree programs. Only a few years ago, the idea of being able to get an MFA in Illustration completely online was unheard of, and now the Academy of Art University is the pioneer in making it happen so an artist can earn an art degree and live anywhere in the world.

After I sent in my application, I braced myself for rejection, because rejection is what I've known when it came to the art that came from my core.

To my pleasant surprise, I received my acceptance letter to the Master of Fine Arts in Illustration last week! I will start the program the Summer semester of 2010 (just after I've completed my floral design certification program). This past week has been a week of letting it really sink in that this is real. The artist in me is finally fully awake again.

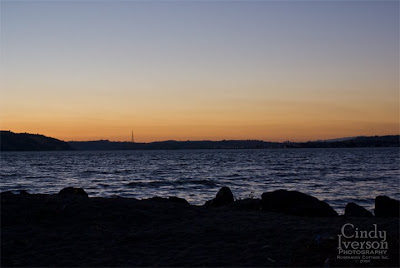
And now I'm taking a maiden voyage on uncharted waters. I hope you'll join me as I do. I'll continue to chronicle my artistic journey here at the Dusting in Pearls blog. And I hope that somehow as I share, my experiences will benefit someone that needs to awake their inner Sleeping Beauty as I did.
Friday, September 25, 2009

Behind the Scenes: Autumnal Bouquet


For this post, I thought it would be fun to share how I go about digitally altering a photograph to make it look like a chalk or pastel drawing like "Autumnal Bouquet" (above).


The first thing I do is find a promising photograph that I've taken of a flower arrangement. I find that the best floral photos are taken in indirect natural light. That means that if the object I'm shooting is being lit by sun come in a nearby window without directly shining on the object, it'll be great lighting. I like to use auto-focus when I shoot so that I get a crisp focus. I aim at the central object in the arrangement (in this case the yellow mum) and then shoot. I take multiple shots just to be sure I've gotten one really good sharp shot.

After I take it back to my computer and bring it into Photoshop (I use CS3, but Photoshop Elements will work too), I make the photograph the first layer in a file.

Then I use the "Place" command to place a texture from a separate file into my current file as a new layer. In this instance, I used my own texture "Toasted Marshmallow".


I enlarge the texture so that it covers the original photo layer completely (don't worry, the other layer is just underneath like one piece of paper on top of another). Then with the new texture layer selected I go to my "Layers" menu and select "Screen". Then I reduce the opacity of the texture layer to 60%. And it looks like this:


Next, I use the "Place" command again to add another texture layer. This time it's my own texture "Autumn Haze".


I rotate and resize the texture so it covers the other two beneath it completely. Then I select the texture layer and reduce the opacity to 70% so it looks like this:

See how it's starting to look like a faint drawing? At this point, with the top texture still selected, I change to the eraser tool and choose a soft edged brush at 10% opacity. Using my digital tablet and stylus (you can do it with a mouse too although it's easier with the tablet and stylus). I "draw" on the edges of the petals to erase away the edges where the light highlights them. I erase away in shadows too. I change the size of my eraser depending on the detail I'm erasing. For the petals, I use a small eraser and for the background I use a large eraser.

Then if I want to enhance some of the shadows and highlights even more, I select the original photograph layer and with the dodge and burn tool set at 10%, I "draw" over a few of the highlights and shadows to really accentuate them as if I was going in with white or dark chalk and deepening those areas.

And the final result looks like this:

Tuesday, September 15, 2009

Dusting in Pearls Bookstore


The book above is just one of my treasured references that I use in my studio for creating. I also have books that have become cherished favorites for other reasons. That's why I decided to open the Dusting in Pearls Bookstore (powered by Amazon). I've only put books in the bookstore that I've read and/or own and that I highly recommend. You'll notice that I now have a link up in the header of this blog that says "Bookstore" and also a link box in the right-hand column on the blog that links to books featured in the Dusting in Pearls Bookstore.

The departments in the Dusting in Pearls Bookstore are:

  • Pearly Creating--filled with books that I reference regularly for creating in my studio
  • Pearly Living--all books that are part of my arsenal of essential books for living
  • Pearly Dreaming--features books (fiction and non-fiction) that have been instrumental in helping me to dream of what I want to be now and in the future
  • Pearly Gardening--my collection of gardening books that I use in my adventures in the garden
  • Pearly Home Improvement--the books here are the critical references my husband and I used to restore and renovate our little home, Rosehaven Cottage
When you order a book through the Dusting in Pearls Bookstore, the order for new books is taken, filled, and shipped by Amazon. You get a beautiful new copy of the book shipped directly to you!

So have fun virtually snooping through my library! Click on any of the bold words in this post to go directly to the Dusting in Pearls Bookstore.

Thursday, September 10, 2009

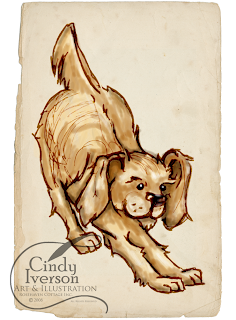
Behind the Scenes: Downward Dog

Click on any of the images in this post to view larger

For this week's "Behind the Scenes" post, I thought it would be fun to share with you how I create an illustration piece from start to finish.

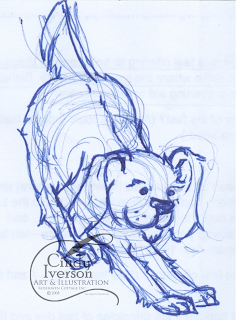
I did a rough sketch of a little dog on the back of some scratch paper when I was sitting in a meeting (it keeps me focused). I sketched it with the ballpoint pen that I had with me and didn't worry about the scratchy sketch lines that always happen when I sketch. I wanted the dog to be in a stretching "play with me" pose so I roughed out the basic shapes of its body lightly and then sketched in the details over the top with heavier strokes. If I make a mistake, I don't worry about it. Afterall, it's a sketch.


This sketch sat on one of my idea boards for months. My "idea boards" are a white board and a bulletin board I have behind my computer workspace with lots of sketches, clippings and ideas on them. That's where it sat until I had the inspiration to move on further with it.

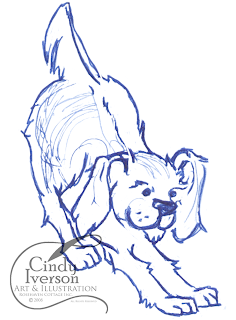
Once I was in the mood to start playing with it more, I scanned it on my flatbed scanner so I had it in my computer as a TIFF file. Then I opened the TIFF file in Photoshop and started cleaning it up. For clean-up work, I use a Wacom digital tablet and digital pen on the eraser setting with a crisp edged brush at various diameters. I liked some of the sketchy lines, so I was careful to not erase those.

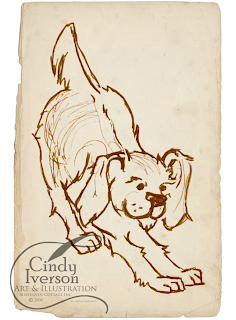
After the little dog was cleaned up to my satisfaction, I opened another Photoshop file and placed the cleaned up sketch as one layer and a scan of an old page of a book as another layer. To change the color of the blue ballpoint sketch, I went into "Curves" to adjust the RGB levels on the sketch layer and tweaked them until the sketch lines were a warm brown. I just eyeball it as I go and don't worry about specific numbers. Then I made the sketch layer a "Linear Burn" over the old page layer to make them more cohesive like I'd sketched the dog on the old paper.


The coloring part was next and that's always fun. I used my Wacom tablet and digital pen again. I almost always set my brush to 20% opacity or less so I can get a washy effect similar to art markers or watercolors. Everytime I changed colors, I made a new layer so I can always go back and remove a layer I don't like without destroying the rest of my work.


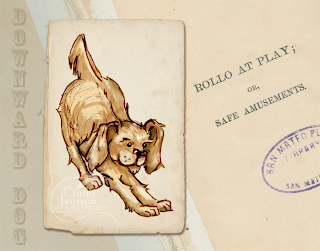
Once the illustration is all colored, it's done! Then I can take it and put it into composition like the one below. To make the composition below, I scanned the inside of an old library book that happened to have a fun title that worked with the illustration. I placed that scan as one layer and then placed the dog as another layer. I added a drop shadow on the dog layer to accent it. Then I added a text layer with the "Downward Dog" text down the left-hand side and reduced the opacity so it wouldn't distract the eye from the illustration of the dog.


Monday, August 31, 2009

Sharing creative inspiration

More than anything else, I like to see others get so inspired by something that they create something new--a dessert, a garden, a painting, or even a memorable moment. Over the past summer, I've reflected a lot on how much joy it brings me to watch someone else go through that precious and very rewarding creative experience. This reflection has caused me to have my own creative epiphanies. One epiphany I had was that with my own work, I would rather inspire people more than having a profit reflected on a spreadsheet.

That huge epiphany led to another one... I could create a digital download shop where everything was free or nearly free. And the big plus with having it be a download shop is that someone has immediate access to the file instead of having to wait for an order to arrive.

As soon as I created the shop, Rosehaven Cottage Digital Download Shop, ideas started pouring in with all the different things I could share. Here are some ideas I came up with...


Textures and overlays are the secret weapon of digital artists and are really easy to use in programs like Photoshop Elements (or the more robust CS3 or CS4) as well as any other graphic software that works in layers. Just like putting a photograph under a piece of gauzy transparent tracing paper or vellum, you can put a digital photograph under a texture or overlay layer to give it a soft look.

Here's a quick example... I took this photograph of some flowers in a vase on my mantle:


Then in Photoshop, I placed the texture Spring Dew (see above) as a new layer over the top of the photograph at a setting of 60% Screen. After a little strategic erasing with a soft-edged eraser set at 10-20%, I got an image that looks like a colored pencil or pastel drawing. Here it is...


Backgrounds


For some people creating photographic art isn't their thing. Some people prefer to work with their hands with something tangible. That's where a "background" can be used. Over the past few years, I've created various different backgrounds for lots of projects. I decided I should make them available for download so others could print them off on their printers with their own paper so they could create whatever they wanted with them--scrapbook pages, origami, invitations, whatever. Or someone can also use the background in its digital form to create something like a digital scrapbook page.


I also have sketchbooks with lots of doodles and sketches in them that I realized would be great as clip art or embellishments for someone's blog, scrapbook, posters, artist trading cards, greeting cards, and more. So as I've gone through my sketchbooks, I've finalized some of my favorite sketches and made them available for download too. I've still got lots more to come.


I came up with the idea of blog graphics just last week. Every so often I'll get a really neat design idea for a blog. But I don't want to change up my entire blog just so I can see the new design I thought up. The solution is to simply make the blog design elements (header and sidebar graphics) available for download at the shop for anyone that wants to use them on their own blog. And I was even able to make this header customizable so someone can change the title to whatever they choose. The "Cheery Cherry" design is the first one I've made available, and I'm certain there will be many more to come.

My Dusting in Pearls online shop is still there for those that want to order fine stationery and art that is already done. But for those that want to do some creating of their own, please visit the Rosehaven Cottage Digital Download Shop. Then drop me a note with your feedback, ideas, suggestions and creative stories. I'd love to hear from you because it makes my own creative process even richer and more rewarding to know that I've inspired you to create something!

Wednesday, August 12, 2009

Latest releases at Dusting in Pearls

Along with sharing the latest releases at the Dusting in Pearls online store, I wanted to let everyone know that if you order a single card with nothing else in your order it is shipped FREE. Your card will be packaged in a rigid mailer so it reaches you in perfect condition. Now you don't even have to hustle down to Wal-Mart or Target to get a card. You can do it from your computer.

Click on any of the images below to read more:


Monday, August 10, 2009

Pink layer cake with black bow ties

I was watching the film "Nanny McPhee" a while back and was so intrigued by the cakes in one of the scenes later in the movie. Luckily, I had my sketchbook in hand and sketched a cake inspired by that scene. Then I went and inked it so I had a clean and crisp ink line-art version. Once I had that done, I scanned it into the computer and used Photoshop to color it digitally.

This hi-resolution non-watermarked digital clip art file is available to download for FREE by clicking here. I've also made the drawing available without color (ink line only) so you can color it yourself if you wish (and that's FREE too!).

Friday, August 7, 2009

A really fun announcement!

"Gerberas and Pink Tulips" Digital Desktop/Wallpaper

I am so excited to finally announce to everyone what I've been up to for the past couple of weeks. I've been sitting here at my computer coding and designing a new website called Rosehaven Cottage Digital Download Shop where all downloads are FREE to 99 cents.

This idea was born out of my desire to share many of my photographs as free desktops/wallpaper for people to download whenever they felt like a "change of scenery". But I also wanted some security for myself so that I didn't have problems with "poachers". I realized that if I created a shop of my own where people signed in before they downloaded, it would make my desires a reality.

I started building the site with the free desktops in mind and then realized that I had a lot of other textures, clip art, and backgrounds I've created (or drawn) that I wanted to share too that would appeal to scrapbookers, crafters, artists, and bloggers. I also realized that I am constantly doodling, sketching and creating things so that the inventory would always be growing.

Over the past couple of weeks, I've been hard at work building the shop site so that all these goodies are available to download. To make it even more fun, the inventory can be viewed by color palette or season of the year as well as the basic product types. You can browse only the FREE stuff if you want. I've tried to make it really easy to find just what you're looking for.

I hope you'll go over there and download some of free desktops to decorate your computer. There are some nice ones perfect for August in the Summer section.

You can get to the Rosehaven Cottage Digital Download Shop by clicking here,
or by visiting www.RosehavenCottage.com and
clicking on the Digital Download Shop button.

If you have problems downloading from the new shop,
please email me at rosehaven_cottage@yahoo.com so I can fix it right away.


IMPORTANT "PEARLY" NOTE: If you are using Internet Explorer, you aren't having the most beautiful "pearly" experience that you could have if you were viewing this site with Mozilla Firefox for the PC or Firefox for the Mac which is available for FREE download at the above links.